

Flow Screens
Overview
Flow comprises two screens:
- View, where you can see the grid with the existing Flows in Active and Draft status
- Editing, accessible from the view only mode, where you can create new Flows and edit existing ones
View Screen
The View screen comprises of a grid which contains the following information about the existing Flows:
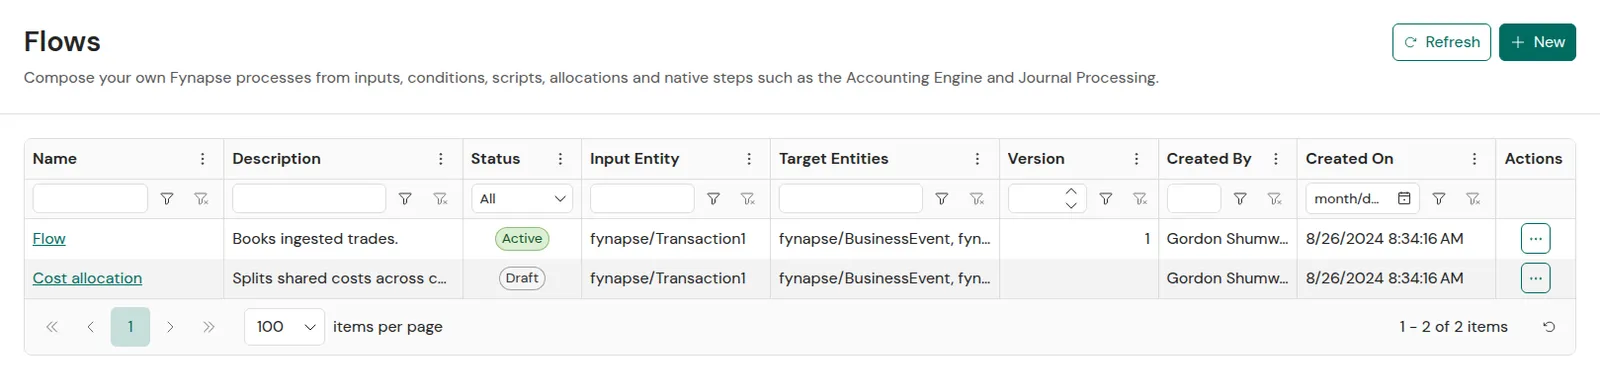
The screenshot shows the grid with two Flows, one Active and one Draft, and the Refresh and New buttons above it.
- Name - name of the Flow; click the name to open the Flow on the Editing screen
- Description - description of the Flow
- Status - status of the Flow
Currently, per one unique Flow name you can have one Published and one Draft version of one Flow.
- Draft - indicates the Flow is in progress and not yet active
- Activating - indicates the draft Flow is being activated when the Submit button has been clicked
If you clicked the Submit button on a new version of an already Active Flow, the older version will automatically change status first to Deactivating, then to Inactive and disappear from the grid.
- Active - indicates the Flow is active
- Archiving - indicates the Flow is being archived
- Deactivating - indicates the Flow is being deactivated
- Inactive - indicates the Flow is inactive; an inactive Flow is a historic version of an active Flow; Flows with this status will not appear in the grid
- Invalid - indicates the Flow has an old data model that is no longer in use; only Active status Flows can become Invalid, when you change the Invalid Flow a new Draft will be created
Invalid Flows cannot be exported in Configuration Data JSON file.
- Input Entity - the Entity that the Flow’s Input step reads, shown as
namespace/name - Target Entities - the Entities that the Flow writes to: the Entities of its Target steps, and the Entities that its Accounting Engine and Journal Import steps write to
- Version - version of the Flow; a new version is created when you click the Submit button
- Created By - username of the user who created the Flow
- Created On - timestamp when the Flow was created
- Actions - the … button opens the Delete action, which deletes the Flow after you confirm. Fynapse archives a deleted Flow and removes it from the grid.
The screen also has two buttons above the grid:
- New - which allows you to create a new Flow
- Refresh - which refreshes the screen
Editing Screen
The Editing screen is where you create new Flows and edit existing ones:
- To create a new Flow, click the New button on the View screen, then follow the instructions in the tutorial below
- To edit an existing Flow, click its name in the Name column
The Editing screen comprises of:
- The working area, where you drag and drop Flow steps and create links between them
- The details panel, which opens to the right of the working area when you click a step. It shows the step’s configuration as a column of sections, such as General, Attributes mapping or Script, where you configure such information as the step Name, input or target Entity, attributes mapping, or the script for the Script step. To configure the Flow’s name and description, click Flow settings, the gear button at the top of the toolbox. To close the panel, click the close button in its header, or an empty part of the working area.
- The Validation panel, which lists validation problems grouped by step. It appears on the right-hand side of the screen after you click the Validate button to verify your Flow against validation rules. Click Show beside a problem to open the step it belongs to.
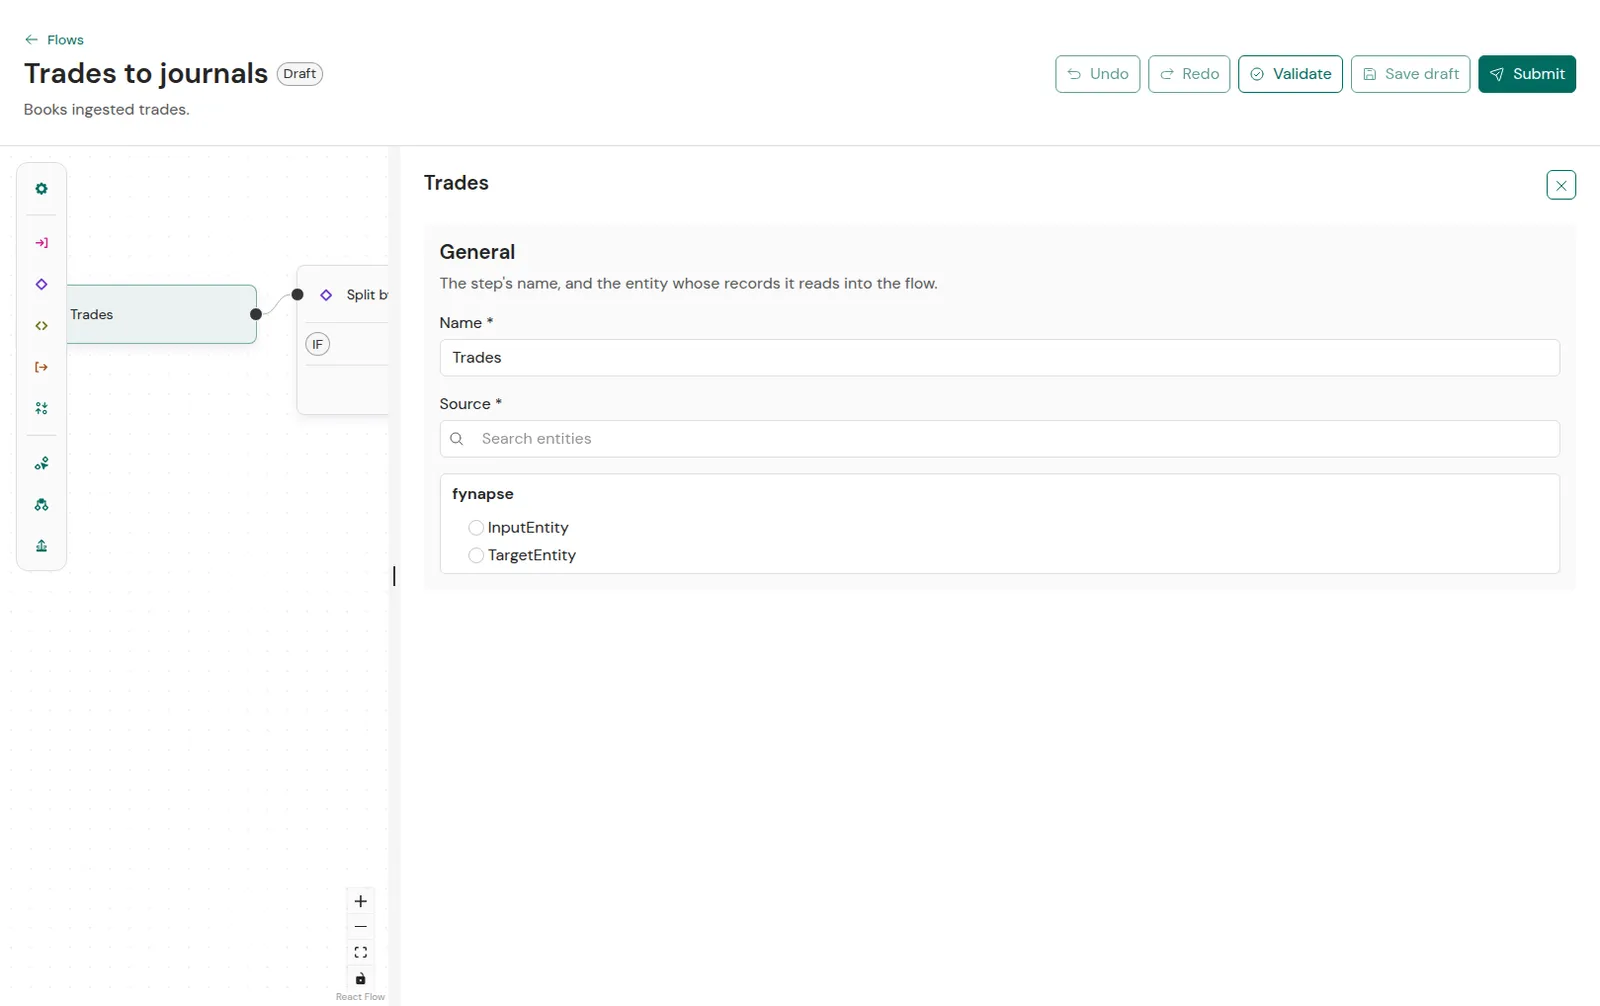
The screenshot shows a Draft Flow with its Input step selected. The step’s details are open on the right, where you pick the source Entity from a list grouped by namespace that you can search.
The header above the working area shows the Flow’s name, its description and the status of the version you are editing, such as Active or Draft.
Working Area Features
The working area has the following features available in the bottom-right corner:
 | Increase size - increases the size of the Flow |
 | Decrease size - decreases the size of the Flow |
 | Optimize - increases the size of the Flow to the maximum available within the working area |
 | Lock - locks the Flow to allow you to move the entire graph |
To delete a step, click the step and press Backspace or Delete on your keyboard. The step’s links are deleted with it.
Editing Pane
The following buttons are available above the working area:
How to Create a Flow?
Flows are comprised of different types of steps, described in details in the steps section. In this example, we will build a simple Flow comprising of four steps: Input, Script, Accounting Engine and Journal Processing. Such a Flow will allow you to e.g. enrich ingested transaction data and use them to generate Business Events and then Journals.
The Map by name button is available in the Attributes mapping card of all steps which require attributes’ mapping. It allows you to automatically map the variables of the group you choose, such as input, to the output attributes with the same name.
-
Go to Flows.
-
On the Flows screen, click the New button.
-
A dialog will appear. In the dialog, type a unique name for your Flow and click the Create button.
-
Drag and drop the Input step from the toolbox to the working area, or click it in the toolbox. An Input step allows you to specify the type of event that will be the trigger for the execution of a Flow. The step’s details open on the right.
-
In the General card, type in a name for your Input step.
-
Select the source Entity from the list, which groups Entities by namespace. To find an Entity, type part of its name in the search box above the list. This has to be a Transaction type Entity.
-
Now that a Flow has a beginning, you can drag and drop a Script step to your working area. A Script step allows you to define different processes, such as lookups, calculations, and data transformations, using Python code.
-
Type a name for your Script step.
-
In the Script card, create the Script for your function. Refer to the Built-in Functions and Types section for a list of pre-defined functions that are available. To give the script the whole window, click Show full screen. Click Exit full screen, or press Esc, to return.
-
Go to the Outputs card to define the attributes that will be generated by this Script step.
-
Click the Add output button. A new row appears in the grid.
-
Type the name of your attribute.
-
Select the type. The available types are:
- Primitive attributes:
- Text
- Integer
- Date
- Boolean
- Decimal - the decimal attribute operates with the following parameters: scale 18 digits and precision 3 digits. This format is hardcoded and cannot be changed.
- High Precision Decimal - the high precision decimal attribute operates with the following parameters: scale 38 digits and precision 18 digits.
- Timestamp
- Uuid
- Complex - this is an equivalent of an Entity, an attribute to which you can add nested child attributes
- List - this is a collection of attributes of the same type
- Primitive attributes:
-
If you selected the List type, select the type of the attributes that will comprise the List attribute in the field beside the type.
-
If you defined a Complex type attribute, or a List of Complex attributes, you can add child attributes by clicking the + button in the Actions column. Then you type the name of the child attribute and select the type.
You edit every attribute in place, and your changes are kept as you make them. To delete an attribute, click the delete button in the Actions column.
-
Once you are done defining the attributes, join the steps with a line by dragging it from the black dot on the right side of the Input step and connecting it to the Script step.
-
Drag and drop an Accounting Engine step. The Accounting Engine step allows you to process Business Events generated by a Flow in order to generate double entry accounting in the form of Journals.
-
Type a name for your Accounting Engine step.
-
Join the Accounting Engine step with the Script step with a line.
If you do not join the steps, you will not be able to see the source attributes in the Attributes mapping card.
-
In the Attributes mapping card, map the Variables to the Output attributes. Click the link button beside a field on one side, then select the checkbox of the field on the other side that you want to link it to. A line joins each pair of linked fields.
-
The Variables comprise the attributes from the Input Entity defined in the Input step and attributes generated by the Script step.
-
The Output attributes are the attributes from the Business Event Definition.
-
Drag and drop a Journal Processor step. The Journal Processor step takes the Journals generated by the Accounting Engine and posts them to the Subledger.
-
Type the name of the Journal Processor step.
-
If you need to remove a step from the Flow, click on the step and press Backspace or Delete on your keyboard.