Accounting Rules Navigator
Overview
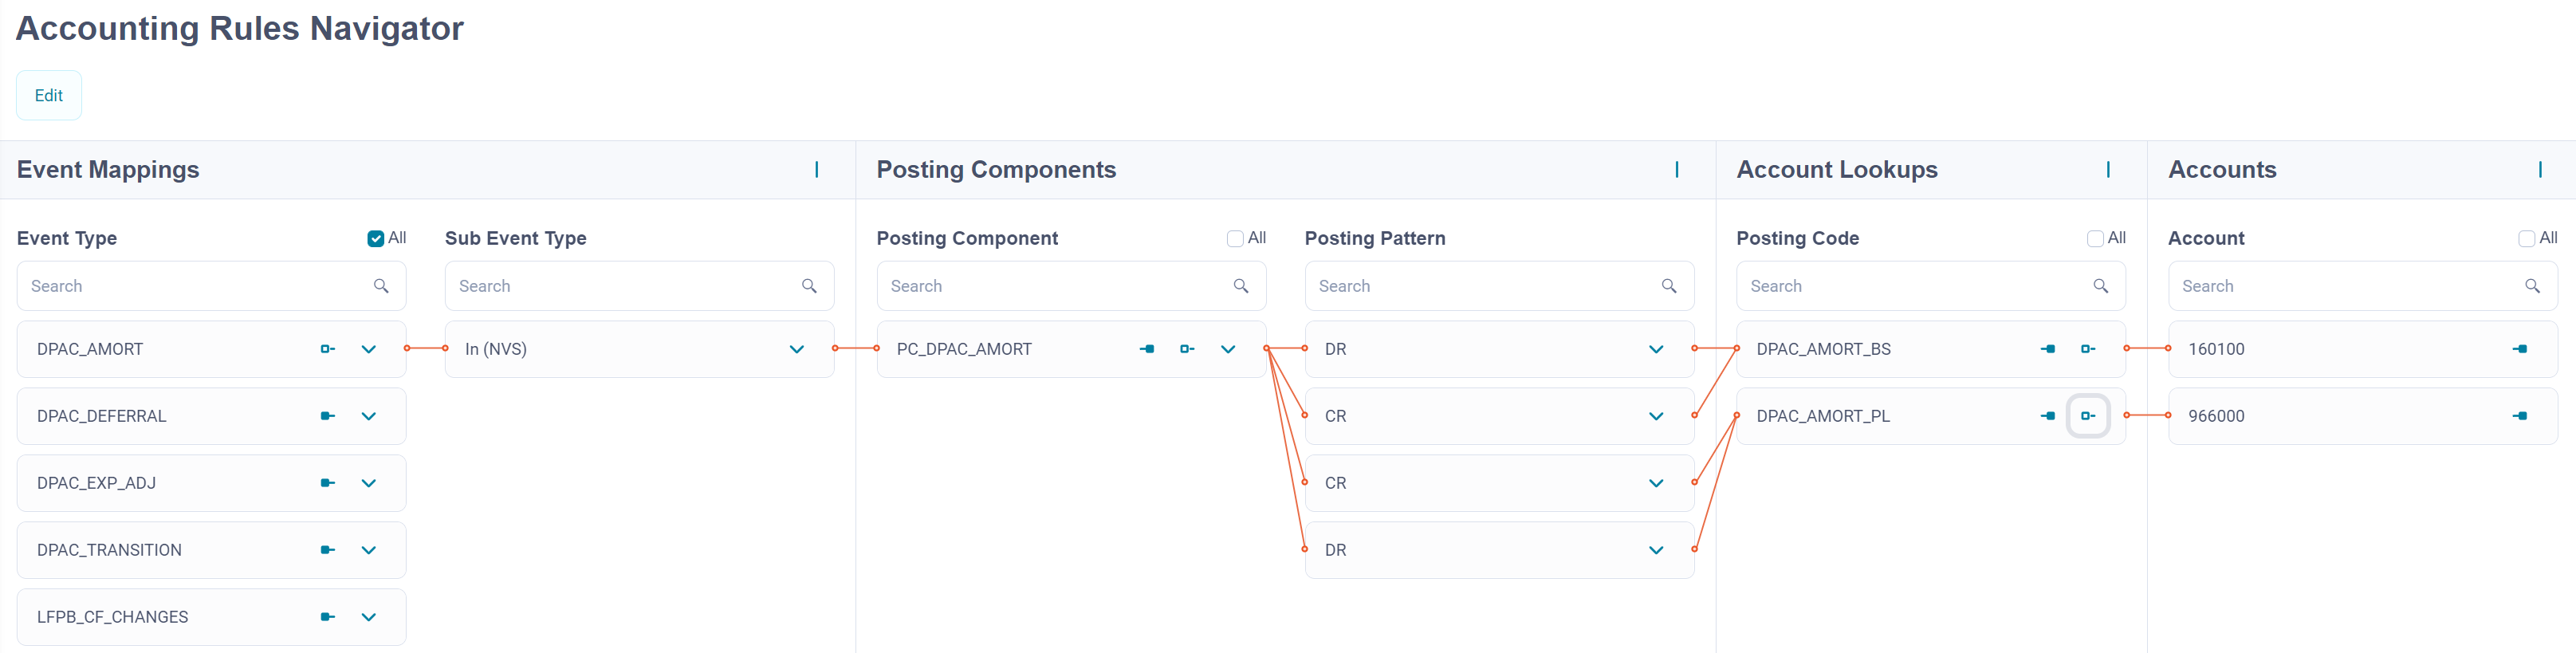
The Accounting Rules Navigator is a visual representation of the accounting rules within the Accounting Engine. The screen allows you to view the data and correlations between the data. By expanding different sections and using the provided drill-down and filtering capabilities, you can see the full picture of a given record.
Prerequisite: Using the Accounting Rules Navigator requires prior configuration of Business Event Definition. If you do not have a Business Event Definition created, an error message informing you that there is no existing Business Event Definition will appear when you open the Accounting Rules Navigator screen.
Browsing and Filtering
The Accounting Rules Navigator screen provides several browsing and filtering options.
By default, when you enter the screen the Event Mappings section is expanded and all Business Event Types are visible.


Downloading the Configuration
You can download the current version of the Accounting Rules Navigator configuration by clicking the Export to XLSX button on the top of the grid.
Importing the Configuration
You can import the configuration of accounting rules in an XLSX format by using the Import button. This feature allows you to perform changes to the existing configuration without the need to edit in the Configuration Data JSON file.
Working with the Data
The Accounting Rules Navigator screen also allows you to create and modify configurations of accounting rules. For more details, refer to Working with the Accounting Rules.
Version History
Whenever you change something in an existing configuration, Fynapse creates a new version of the configuration to overwrite the previous one. Subsequent versions are given incremental numbers, which are assigned by default and are non-editable. The initial version of a configuration is given the number: “V 1”, the second “V 2“, and so on.
Note that the historic versions of the Accounting Rules Navigator configurations contain information about linked configurations of items such as Nodes, Accounting Bases, etc. These configurations are not versioned, so when you view the historic version of the Accounting Rules Navigator configuration, it will contain details of the current configuration of these items. For example, if you remove an Accounting Base that was used in e.g., V1, the field where the name of that Accounting Base will be empty in the historic version.
You can view previous versions of accounting rules’ configurations, by clicking the Show History button. A version history grid with the following information will appear:
- Version - a number of the version
- Last modified - the date when the version was created
- Modified by - who created the version
- Comment - a mandatory comment you are prompted to add when changing a configuration
- Actions - allows you to export a historic version of the Accounting Rules Navigator configuration in the XLSX format
The exported version of the Accounting Rules Navigator configuration contains information about linked configurations of items such as Nodes, Accounting Bases, etc. These configurations are not versioned, so when you download a historic version of the Accounting Rules Navigator configuration, it will contain details of the current configuration of these items. For example, if you remove an Accounting Base that was used in e.g., V1, the field where the name of that Accounting Base will be empty in the downloaded file.
You can switch between historical versions by clicking on different items in the Version grid.
You can also collapse the tabs on the left to get a larger view of the historical version’s details section by clicking the collapse buttons at the top of each tab.
To exit the history details section of the given historical version of a Fiscal Calendar click the X button. You will go back to the version history grid
To close the version history grid, click the Hide History button.
How to View Version History of Accounting Rules?
- Go to Configuration > Accounting Rules Navigator.
- Click the Show History button. A new grid with version history for the accounting rules will open.
- Left-click on the version you want to view. The history details section will open on the right-hand side of the grid. You can switch between historical versions by clicking on different items in the Version grid.
- To exit the history details section of the given historical version of the accounting rules click the X button. You will go back to the version history grid.
- To close the version history grid click the Hide History button.